Why DIY Beauty Treatments Are Your Gateway to Natural Self-Care
DIY beauty treatments offer a natural, cost-effective way to pamper yourself at home while knowing exactly what goes on your skin. During the pandemic, searches for at-home beauty treatments increased by over 200% globally, and 72% of people who tried DIY methods continue using them today.
Quick DIY Beauty Treatment Options:
• Face: Honey-oatmeal masks, cucumber eye treatments, DIY facials
• Hair: Avocado deep conditioning, rice water rinses, scalp scrubs
• Body: Coffee scrubs, sugar exfoliants, homemade bath bombs
• Nails: Cuticle oils, lemon brightening soaks, at-home manicures
• Tools: Gua sha, jade rollers, LED masks, derma rollers
Emma, you’re not alone in wanting transparency about what touches your skin. The beauty industry’s shift toward clean ingredients has many people turning to their kitchens for solutions. A simple avocado-honey mask costs under $2 compared to $15-30 for similar store-bought treatments.
The best part? You control every ingredient. No mysterious chemicals, no plastic waste, and no wondering if that expensive serum actually works.
Safety comes first though. Always patch-test new ingredients on your inner wrist 24 hours before applying to your face. Skip DIY treatments if you have active breakouts, cuts, or sensitive conditions like rosacea.
This guide will walk you through creating your own spa sanctuary and mastering treatments that actually deliver results – all while staying true to your eco-conscious values.

Simple guide to DIY beauty treatments terms:
– Beauty and wellness trends
– DIY face masks
Setting the Stage: Your Home-Spa Sanctuary

The magic of DIY beauty treatments starts before you even touch your first ingredient. Your environment sets the tone for everything that follows, changing a simple face mask into a true escape from daily stress.
Think of your space as a blank canvas waiting for change. Start by decluttering your bathroom completely – nothing ruins the zen vibe like searching for cotton pads while honey drips down your face. Gather fresh towels, a comfortable headband, and all your treatment ingredients in one spot before you begin.
Lighting creates instant ambiance without any fancy equipment. Dim those harsh overhead lights and light a few candles around your space. Just keep them safely away from your treatments and ingredients. The warm, flickering glow signals to your nervous system that it’s time to slow down and unwind.
Your soundtrack matters more than you might think. While some beauty experts swear by rainforest sounds, others prefer everything from classical music to podcasts. The Fat Mascara podcast for relaxation offers the perfect blend of beauty chat and calming conversation that many find soothing during longer treatments.
Steaming opens your pores and helps treatments absorb better, but you don’t need expensive equipment. Fill a large bowl with hot water, add a few drops of eucalyptus or lavender essential oil, then drape a towel over your head as you lean over the bowl for 5-10 minutes.
Don’t forget the power of breathing exercises during your treatments. The simple 4-7-8 technique – inhale for 4 counts, hold for 7, exhale for 8 – activates your body’s relaxation response while your mask works its magic.

DIY beauty treatments mood boosters
Essential oils lift your treatments from basic to luxurious while adding real therapeutic benefits. Lavender calms both stressed skin and frazzled nerves, making it perfect for evening routines. Peppermint energizes tired skin and reduces morning puffiness – just what you need for a weekend reset.
Tea tree oil brings powerful antibacterial properties to acne-fighting treatments, but always dilute it properly with one drop per tablespoon of carrier oil. Never apply essential oils directly to your skin.
Music therapy works wonders during longer treatments like hair masks or body scrubs. Create a playlist that matches your mood – upbeat songs for energizing morning routines or mellow tunes for relaxing evening rituals. The key is choosing sounds that help you stay present and enjoy the process.
The simple act of taking intentional deep breaths amplifies every benefit of your DIY beauty treatments. As your mask sets or your hair treatment soaks in, focus on slow, deliberate breathing. This transforms what could feel like waiting time into genuine meditation and stress relief.
DIY Beauty Treatments 101: Choosing the Right Method
Think of choosing DIY beauty treatments like picking the perfect outfit – what works beautifully on your best friend might be completely wrong for you. Your unique skin type, hair texture, and even the current season all play starring roles in determining which treatments will make you glow versus which ones might leave you looking like a tomato.
Let’s start with skin – the canvas for most of our beauty trips. Oily skin thrives with ingredients that help balance sebum production. Clay masks become your best friend, along with charcoal treatments that draw out impurities. Here’s a fun fact: tomatoes aren’t just for salads! They contain natural acids that help control oil without over-drying your skin.
Dry skin craves moisture and nourishment, so you’ll want to raid your kitchen for honey, avocado, and oats. These ingredients don’t just sit on your skin’s surface – they actually help restore your natural moisture barrier.
If you have sensitive skin, stick with cooling, gentle ingredients like cucumber, aloe vera, and plain yogurt. Skip anything with strong fragrances or high acid concentrations, no matter how many glowing reviews you’ve read online.
Hair has its own set of rules, and understanding your hair’s porosity makes all the difference. Low-porosity hair (where water beads up instead of soaking in) prefers lightweight oils like jojoba or argan. High-porosity hair that drinks up water quickly can handle richer treatments like coconut oil or shea butter masks.
Here’s your golden rule: always patch-test new ingredients 24 hours before slathering them all over your face. Apply a small amount to your inner wrist and watch for any redness, itching, or irritation. Trust us – this simple step prevents spa day disasters and potential skin damage.
The budget benefits of DIY beauty treatments are genuinely impressive. Many people report saving $50-100 monthly by switching to homemade alternatives. A honey-oat facial costs under $1 compared to $75+ for professional treatments – and often works just as well.
For comprehensive ingredient guidance, check out our detailed DIY Skincare Ingredients resource that breaks down which components work best for different skin concerns.
| Treatment Type | Professional Cost | DIY Cost | Time Investment |
|---|---|---|---|
| Facial | $75-150 | $1-5 | 30-45 minutes |
| Hair Mask | $40-80 | $2-8 | 20-30 minutes |
| Body Scrub | $30-60 | $3-10 | 15-20 minutes |
| Manicure | $25-50 | $5-15 | 45-60 minutes |
Picking safe DIY beauty treatments
Safety goes far beyond patch testing, though that’s certainly where it starts. Think of it as creating boundaries for your beauty experiments – knowing when to say yes to DIY and when to step back.
Skip homemade treatments if you’re dealing with active infections, open wounds, or currently using prescription retinoids or acids. These medications can interact unpredictably with natural ingredients, potentially causing irritation or reducing their effectiveness.
Pet and child safety deserves serious attention in your DIY planning. Many essential oils that smell heavenly to us are actually toxic to cats. Ingredients like xylitol, sometimes found in natural toothpastes, can be deadly to dogs. Always store your beauty ingredients safely and keep treatments away from curious paws and little hands.
Sun sensitivity is another crucial consideration. Never use citrus oils before heading outside – they can cause severe burns and lasting hyperpigmentation. Similarly, avoid strong acids like pure lemon juice on sensitive areas or before sun exposure.
Focus on DIY beauty treatments for sensitive skin
Having sensitive skin doesn’t mean you’re stuck with boring, ineffective treatments. It just means you get to be more selective and gentle with your choices – think of it as curating a luxury collection rather than settling for less.
Oatmeal becomes your skincare superhero when you have sensitive skin. It contains special compounds called avenanthramides that actively reduce inflammation and soothe irritation. Colloidal oatmeal (the finely ground version) works best for masks and gentle cleansers because it blends smoothly without scratchy texture.
Raw honey, especially Manuka honey, offers antibacterial and anti-inflammatory benefits without any harshness. It’s naturally humectant, meaning it actually draws moisture from the air to your skin – like having a tiny moisture magnet working for you.
Fragrance-free formulations should be your default choice. Even natural fragrances from essential oils can trigger sensitivity in reactive skin. Focus on the therapeutic benefits of ingredients rather than how they smell.
For gentle exfoliation options that won’t irritate sensitive skin, explore our comprehensive guide to DIY Exfoliating Scrubs for Sensitive Skin for detailed recipes and techniques.
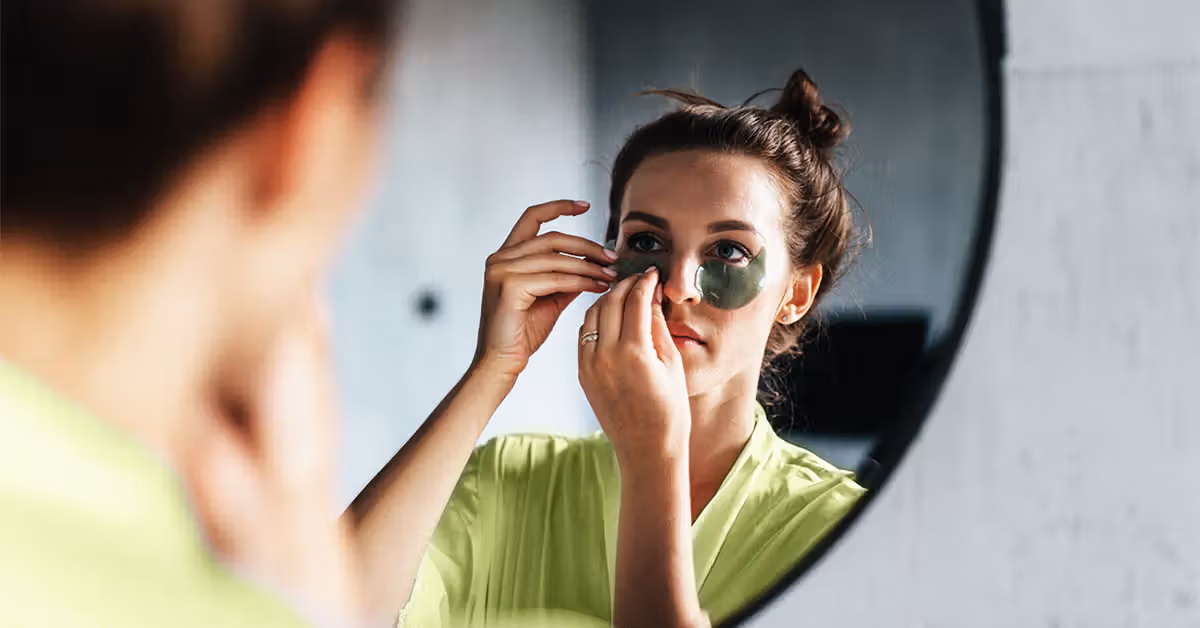
Face First: The At-Home Facial Routine
Your bathroom can become a professional spa with the right approach to DIY beauty treatments for your face. The secret isn’t expensive equipment – it’s following the same proven steps that estheticians use and taking your time with each one.
Start with a double cleanse that actually removes everything from your day. First, massage an oil-based cleanser (even plain olive oil works beautifully) into dry skin to dissolve makeup and sunscreen. Then follow with a gentle foam or cream cleanser to remove any remaining residue. This two-step process ensures your skin is genuinely clean and ready to absorb the treatments that follow.
Exfoliation comes next, but here’s where many people go wrong – they scrub too hard or too often. Physical exfoliants like sugar or ground almonds give instant gratification, but use them gently and no more than twice weekly. Chemical exfoliants from fruit acids work more gradually but tend to be kinder to your skin barrier.
Steaming opens your pores and makes everything that follows more effective. Hold your face over a bowl of hot water for five to ten minutes – any longer can actually irritate sensitive skin. This step softens debris and preps your skin for better product absorption.
The masking phase is where you’ll see the most dramatic results. Choose your mask based on what your skin needs right now, not what worked last month. Clay masks draw out impurities, honey provides deep hydration, and fruit enzymes offer gentle brightening. Always remove masks while they’re still slightly damp – letting clay masks crack and harden can be too harsh.
Finish with facial massage using clean fingers, a jade roller, or gua sha tool. These techniques promote lymphatic drainage and help your moisturizer penetrate deeper. Always work in upward and outward motions, and remember to clean any tools thoroughly between uses.
Don’t forget SPF the next morning – all that exfoliation makes your skin more sensitive to sun damage. For comprehensive guidance on creating the perfect facial routine, explore our DIY Facial Treatments resource.
DIY beauty treatments – glow-boosting masks
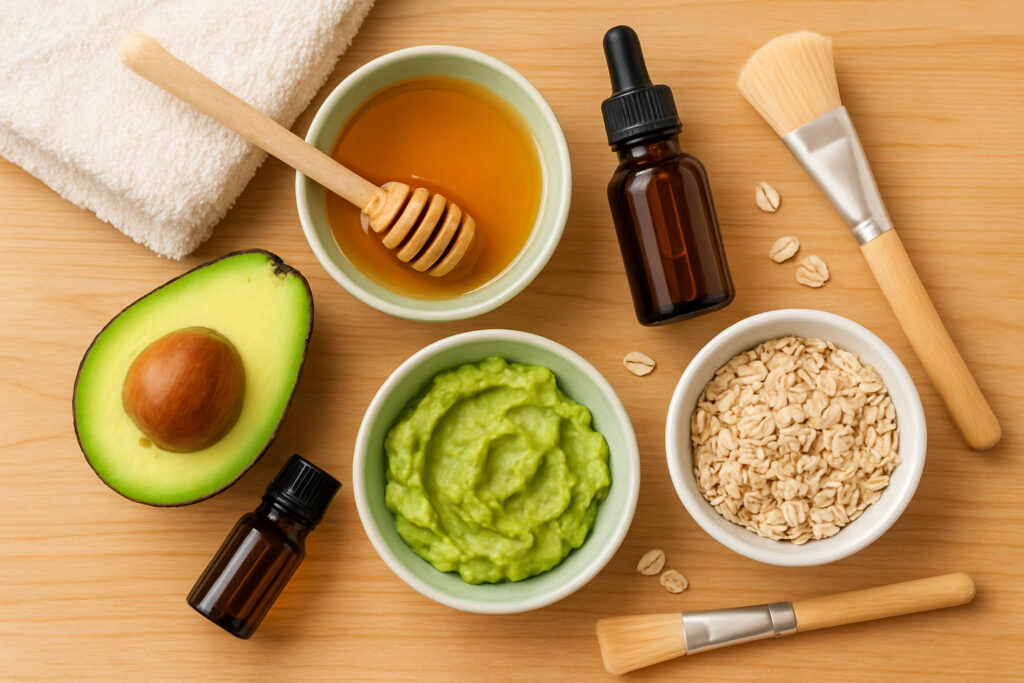
The avocado-honey mask has earned its cult status for delivering real results. Avocados provide healthy fats that actually nourish your skin barrier, while raw honey offers antibacterial benefits without stripping moisture. Simply mash half a ripe avocado with one tablespoon of raw honey, apply for 15 minutes, then rinse with lukewarm water.
If you’re dealing with oily skin, the yogurt-pumpkin combination works wonders. Mix two tablespoons of plain Greek yogurt with one tablespoon of pure pumpkin puree (not the pie filling from your pantry). The lactic acid in yogurt provides gentle exfoliation while pumpkin’s natural enzymes brighten without irritation.
Clay detox masks remain the gold standard for deep cleaning, but here’s the trick professionals know: never let them completely dry and crack on your face. Remove while the clay is still slightly damp to avoid over-drying your skin.
For more mask inspiration and detailed recipes, check out our complete DIY Face Masks collection.
At-home devices & tools
The at-home beauty device market is exploding for good reason – many of these tools actually deliver results when used correctly. But knowing which ones work and how to use them safely makes all the difference.
LED masks use specific light wavelengths to target different skin concerns. Red light stimulates collagen production for anti-aging benefits, blue light kills acne-causing bacteria, and yellow light soothes sensitive skin. Use for 10-20 minutes, three to four times weekly, but never look directly at the lights during treatment.
Microcurrent devices provide gentle electrical stimulation that may help tone facial muscles temporarily. While the results aren’t permanent like surgical procedures, regular use can improve skin firmness and create a subtle lifting effect.
Dermaplaning tools remove dead skin cells and peach fuzz, creating the smoothest possible canvas for makeup application. The key is using feather-light strokes on clean, dry skin. Never dermaplane over active breakouts or irritated areas – this can spread bacteria and worsen inflammation.
Microneedling devices create tiny punctures that may stimulate your skin’s natural collagen production, but home versions should only have very short needles (0.25-0.5mm maximum). Always disinfect these tools thoroughly before and after each use to prevent infection.
Sanitization is crucial for all beauty tools. Clean everything with rubbing alcohol or specialized device cleaners, and replace disposable items regularly. Your skin will thank you for the extra attention to hygiene.
For scientific evidence supporting these treatments, this Scientific research on light therapy provides valuable insights into how these technologies actually work.
Hair Rescue Remedies From Root to Tip

Your hair tells the story of your life – late nights, stress, that experimental bleaching phase, even the dry winter air. The good news? DIY beauty treatments can help repair damage and restore your hair’s natural vitality without expensive salon visits.
Think of your hair like a garden. The scalp is the soil, and healthy roots create strong, beautiful strands. Many people focus only on the ends while ignoring scalp health, but that’s like trying to grow roses in poor dirt.
Protein versus moisture is the eternal hair care question. Damaged hair needs protein to fill in gaps where the cuticle has lifted or broken. But too much protein makes hair brittle and straw-like. Signs you need protein include hair that stretches and breaks easily, feels mushy when wet, or won’t hold a curl.
Moisture-hungry hair feels dry, looks dull, and tangles easily. This is where rich ingredients like avocado, honey, and coconut oil work their magic. The key is finding your hair’s sweet spot – most hair needs both protein and moisture in different ratios.
Rosemary rinses have gained popularity after studies showed rosemary essential oil can be as effective as some commercial hair growth treatments. Steep fresh rosemary in hot water for 30 minutes, strain, and use as a final rinse. The improved circulation to your scalp creates an environment where healthy hair can thrive.
For comprehensive natural hair care guidance, explore our DIY Natural Beauty Tips guide.
DIY beauty treatments for damaged hair
The egg-yogurt mask is like a protein smoothie for your hair. One egg yolk contains the same keratin protein that makes up your hair shaft, while yogurt’s lactic acid gently removes product buildup that weighs hair down. Mix one egg yolk with two tablespoons of plain Greek yogurt and one tablespoon of honey for added moisture.
Apply this mixture to damp (not soaking) hair from mid-length to ends, avoiding the scalp area. Cover with a shower cap and leave for 20 minutes. The warmth helps the proteins penetrate deeper into damaged areas. Rinse with cool water – hot water will actually cook the egg and make it harder to remove.
For severely damaged hair that’s been over-processed or heat-styled, an olive-coconut oil soak provides intensive repair. Olive oil’s small molecules penetrate the hair shaft, while coconut oil coats and protects. Mix equal parts of both oils, warm slightly, and apply to dry hair. Wrap in a warm towel for 30 minutes, then shampoo twice to ensure all oil is removed.
Rice water rinses might sound trendy, but they’ve been used in Asia for over 1,000 years. The water left over from cooking rice contains amino acids, vitamins, and inositol – a compound that can actually repair damaged hair from the inside. Let rice water ferment for 24 hours at room temperature before using as a final rinse after shampooing.
Frizz, curl & shine hacks
Frizz happens when hair’s outer layer (the cuticle) lifts and allows moisture from the air to enter the hair shaft. Apple cider vinegar works as a natural cuticle-sealer because of its acidic pH. Mix one part raw apple cider vinegar with three parts water and use as a final rinse after shampooing.
The vinegar smell disappears once your hair dries, leaving behind smoother, shinier strands. But don’t overdo it – once weekly is plenty, as too much acid can actually damage your hair over time.
For those with natural curls or waves, an aloe-castor oil leave-in treatment can transform frizzy hair into defined, bouncy curls. Mix two tablespoons of pure aloe vera gel with one teaspoon of castor oil. The aloe provides lightweight moisture while castor oil adds slip and definition.
Apply this mixture to damp hair using the “praying hands” method – smooth it down the length of your hair rather than scrunching it in. This prevents disrupting your natural curl pattern and reduces frizz. Air dry for best results, or use a diffuser on low heat if you’re in a hurry.
Hands, Feet & Nails: Salon-Quality at Home
Your hands and feet deserve the same pampering you give your face. After all, they work the hardest and often show the first signs of aging and neglect. The good news? DIY beauty treatments for your extremities can deliver salon-worthy results without the hefty price tag.
Let’s start with cuticle care, because healthy cuticles make even bare nails look polished. Instead of cutting them (which can lead to infection), soften and push them back gently. Create a nourishing cuticle oil by mixing equal parts olive oil and honey. The oil provides deep moisture while honey’s natural antibacterial properties help prevent those painful hangnails and infections.
Your hands take a beating from constant washing, weather, and daily tasks. A weekly sugar-lemon scrub works wonders for removing dead skin and brightening age spots. Mix brown sugar with fresh lemon juice and a splash of olive oil. The sugar removes dead skin cells, lemon naturally brightens dark spots, and oil leaves your hands silky smooth. Pay extra attention to your knuckles and any rough patches around your nails.
When it comes to removing gel polish at home, patience is everything. Resist the urge to peel or force it off, which can damage your natural nails for months. Instead, soak cotton pads in acetone, place one on each nail, wrap with small pieces of foil, and wait 15 minutes. The polish should slide off easily with gentle pressure. Your nails will thank you later.
Foot care requires a bit more intensive treatment since our feet carry us through life. A weekly Epsom salt soak does more than just feel amazing – it softens calluses, reduces inflammation, and prepares your feet for deeper treatments. Add a few drops of tea tree oil for its antimicrobial benefits, especially if you’re prone to athlete’s foot or other fungal issues.
For comprehensive hand and foot care recipes, check out our DIY Natural Skincare collection.
DIY beauty treatments manicure mastery
Getting professional-looking nails at home comes down to proper technique and patience. Always shape your nails when they’re completely dry to prevent splitting and cracking. File in one smooth direction only – that back-and-forth sawing motion creates microscopic tears that lead to breaks later.
The most universally flattering nail shape is square-oval (also called “squoval”). It’s practical for typing and daily tasks while still looking neat. Round shapes work well for shorter nails, while true squares suit longer lengths.
Here’s a game-changing base coat hack that nail techs don’t want you to know: apply a thin layer of clear nail glue before your base coat. It fills in ridges and creates an ultra-smooth surface that helps your manicure last twice as long. Just make sure it’s completely dry before moving to the next step.
Speed up your drying time with the ice water trick. After your final coat, wait two minutes, then dip your nails in a bowl of ice water for 30 seconds. The cold temperature sets the polish instantly. Alternatively, spray your nails with cooking spray – the oils help seal the polish while adding shine.
Soft-heel foot therapy
Rough, cracked heels need serious intervention, but you don’t need expensive treatments. Create an oatmeal-sea salt soak by grinding old-fashioned oats into a fine powder, mixing with coarse sea salt and warm water. The oats contain natural compounds that reduce inflammation, while salt gently exfoliates. Soak for 15 minutes, then use a pumice stone in gentle circular motions.
For overnight heel repair, make peppermint lotion bars that provide intensive moisture with a cooling sensation. Melt equal parts coconut oil, shea butter, and beeswax in a double boiler. Add 10-15 drops of peppermint essential oil, pour into silicone molds, and let cool. These solid bars won’t spill in your bedside drawer and provide concentrated moisture exactly where you need it.
The key to maintaining soft feet is consistency. Even five minutes of daily attention beats sporadic hour-long treatments. Your feet will transform from rough and neglected to sandal-ready in just a few weeks of regular care.
Body Confidence: Smooth Skin, Even Tone & Safe Glow

Your body deserves the same attention you give your face. DIY beauty treatments for your entire body can transform rough, uneven skin into the smooth, glowing canvas you’ve always wanted – all from the comfort of your own bathroom.
Start with dry brushing before you shower. This simple ritual does wonders for circulation and lymphatic drainage while sloughing off dead skin cells. Use a natural bristle brush and make long strokes toward your heart, beginning at your feet and working upward. Your skin should look pleasantly pink afterward, not angry red.
The internet-famous coffee cellulite scrub actually has science behind it. Caffeine temporarily tightens skin and boosts circulation, which can minimize the appearance of dimpled areas. Mix your used coffee grounds with coconut oil and brown sugar, then scrub in firm circular motions during your shower. Use this treatment three to four times weekly for the best results.
Self-tanning at home requires patience, but the payoff is worth it. Always exfoliate thoroughly first – any dead skin will create patchy, uneven color. Use a tanning mitt for streak-free application and build your color gradually with light layers. For a completely natural approach, try mixing unsweetened cocoa powder with your regular body moisturizer for a subtle, chemical-free glow.
If you struggle with body acne or ingrown hairs, particularly around your underarms or bikini line, willow bark tea acts as nature’s salicylic acid. Brew strong willow bark tea, let it cool, then mix with witch hazel for a gentle treatment that unclogs pores without harsh chemicals.
The Breaking Beauty podcast inspiration often discusses how body confidence starts with consistent care routines that make you feel pampered rather than rushed.
DIY beauty treatments for hair removal
Sugar waxing (also called sugaring) offers a gentler alternative to traditional wax and uses only three kitchen ingredients. Heat one cup of sugar with a quarter cup each of lemon juice and water until it reaches a honey-like consistency. Let it cool slightly – you want it warm but not burning hot.
Apply the sugar paste against your hair growth direction, then remove it quickly in the direction your hair grows. This technique reduces breakage and ingrown hairs compared to traditional waxing methods.
After any hair removal method, soothe your skin with a post-wax calming gel made from pure aloe vera and a few drops of tea tree oil. This combination reduces inflammation and has antibacterial properties that prevent those annoying bumps and ingrowns. Apply immediately after hair removal and again the following day.

IPL devices work differently by targeting the pigment in your hair follicles. They’re most effective on dark hair against light skin, and patience is essential – you won’t see results for eight to twelve weeks of consistent use. However, the long-lasting hair reduction can be worth the investment and commitment.
At-home whitening & brightening
Oil pulling with coconut oil brightens your smile more gently than harsh whitening chemicals. Start by swishing one tablespoon of melted coconut oil in your mouth for just five minutes, gradually working up to fifteen to twenty minutes over several weeks. The lauric acid in coconut oil has natural antibacterial properties that can improve both tooth color and oral health.
While baking soda toothpaste does work for whitening, use it sparingly – maybe once weekly mixed with your regular toothpaste. Its abrasive nature can damage your tooth enamel if used too frequently.
For brightening dark spots or uneven skin tone on your body, gentle natural ingredients work best over time. A strawberry-bicarbonate mask combines the natural fruit acids in strawberries with the mild exfoliating action of baking soda, but always patch-test first and avoid sun exposure afterward.
For comprehensive guidance on tackling hyperpigmentation safely, check out our Natural Remedies for Hyperpigmentation on Face – many of these gentle methods work beautifully on body skin too.
Frequently Asked Questions about DIY Beauty
How can I safely perform a facial at home?
The secret to a safe at-home facial starts before you even touch your face. Wash your hands thoroughly and make sure your face is completely clean. This simple step prevents bacteria from causing breakouts or infections.
Follow the classic facial sequence: double cleanse, steam, gently exfoliate, apply your mask, then moisturize. But here’s the most important part – actually listen to your skin throughout the process. If anything stings, burns, or feels uncomfortable, remove it immediately and rinse with cool water.
Never attempt extractions at home. We know those blackheads are tempting, but squeezing or picking can push bacteria deeper into your skin, causing scarring and infections that take months to heal. Leave extractions to the professionals who have proper tools and training.
Stick to gentle, proven ingredients like honey, oatmeal, and yogurt for your first few attempts. Once you understand how your skin responds, you can gradually try more active ingredients. Patch-testing isn’t optional – it’s your safety net.
What’s the best at-home treatment for extremely dry hair?
When your hair feels like straw, you need intensive moisture therapy. The overnight coconut oil treatment works wonders for severely damaged or dry hair, but timing and technique matter.
Warm coconut oil until it’s liquid but not hot (test on your wrist first). Apply generously from mid-length to ends, avoiding your roots unless your scalp is also very dry. The oil can make roots look greasy and may clog follicles.
Cover your hair with a silk scarf or shower cap to protect your pillowcase, then sleep with the treatment in. In the morning, shampoo twice – the first wash removes most of the oil, the second ensures your hair isn’t left greasy.
Consistency beats intensity with hair treatments. Do this weekly until you see improvement, then switch to monthly maintenance. Your hair didn’t get damaged overnight, and it won’t heal overnight either. Be patient with the process.
When should I skip DIY and see a pro?
Some situations require professional expertise, and recognizing these moments protects both your safety and your results. Persistent acne that doesn’t respond to gentle DIY beauty treatments after 6-8 weeks needs dermatological attention. What looks like simple breakouts might actually be hormonal acne, rosacea, or another condition requiring prescription treatment.
Any changes in moles or new skin growths warrant immediate professional evaluation. Don’t try to treat these yourself – early detection of skin cancer saves lives.
Severe hair loss beyond normal shedding (more than 100 hairs daily) often has underlying causes that need medical investigation. Hair loss can signal thyroid issues, nutritional deficiencies, or autoimmune conditions.
Nail infections with symptoms like persistent redness, swelling, or pus require antifungal or antibiotic treatment that you can’t get over the counter.
If you’re using prescription treatments like retinoids or acids, check with your dermatologist before adding any DIY treatments. These medications make your skin more sensitive and can react unpredictably with natural ingredients.
Conditions like rosacea, eczema, or psoriasis need professional management. While gentle DIY treatments might complement medical care, they shouldn’t replace it.
When in doubt, professional guidance is always worth the investment. A dermatologist can help you understand your skin’s needs and suggest which DIY treatments might work safely alongside professional care.
Conclusion
Your journey into DIY beauty treatments doesn’t end here – it’s just beginning. What started as a simple desire for cleaner, more affordable beauty solutions has hopefully grown into something deeper: a genuine understanding of what your skin and hair actually need.
The beauty industry wants you to believe that effective treatments require expensive products and complicated routines. But you now know better. Honey, oats, and avocado work just as well as serums with unpronounceable ingredients. Sometimes they work better.
Consistency beats perfection every single time. That weekly honey-oat mask will do more for your skin than the most expensive treatment used once a month. Your bathroom cabinet doesn’t need to look like a beauty store – it needs ingredients that work for your unique needs.
Safety always comes first, though. Never skip patch tests, even for ingredients you’ve used before. Your skin changes with seasons, stress, and age. What worked last year might not work today, and that’s completely normal.
The most successful DIY beauty treatments become rituals you actually look forward to. Maybe it’s your Sunday evening facial while listening to your favorite podcast. Or perhaps it’s that weekly hair mask that gives you an excuse to slow down and breathe.
Start where you are, use what excites you, and build slowly. Master one treatment before adding another. Your future self will thank you for the patience.
At Beyond Beauty Lab, we believe beauty education empowers better choices. These natural treatments work because they nourish rather than strip. They’re gentle because they don’t need to be harsh to be effective.
Ready to expand your natural beauty knowledge? Our team has curated comprehensive guides and expert insights to support your clean beauty journey. Visit More info about our full Resource Guide for evidence-based resources that take the guesswork out of natural skincare.
Your kitchen is now your personal spa. Your ingredients are your tools. And your commitment to safer, cleaner beauty practices is an investment in both your health and the planet.
The best DIY beauty treatments are the ones that make you feel confident and cared for. Trust the process, listen to your skin, and enjoy finding what works uniquely for you.